How to buy Web Hosting with Free Domain Name for your WordPress Blog

Most new bloggers usually commit the error of purchasing a web host from unreliable companies and later regret this mistake. In this detailed guide, I will share everything you need to know to purchase a reliable host and domain name for your blog. This will help you learn how to create and generate money from a successful blog.
For the purposes of this tutorial, I will use Bluehost, an officially recommended hosting service for WordPress.
Bluehost will give you a bonus of one domain name for FREE
This will help you save money and also give you the freedom to manage everything from one dashboard.
Bluehost provides a free SSL certificate that is essential and you also have the option to upgrade to PHP 7.0. With Bluehost, you will receive a free domain name as a bonus. This will not only save you money, it will also make it easy to manage everything in one place.
I suggest you follow this article and buy your hosting plan and domain name as shown here. Note: this is a detailed guide. Take a cup of coffee and follow my lead!
Also Read:
The Importance of having Passive Income Sources
Before starting, here are some things to consider:
- Domain name
A domain name can be likened to an offline address. This is where your blog / website reside.
You will receive a free domain name with Bluehost, or you can use one of the existing domain names if you have already purchased one. (Even if you do not need the free domain name at the moment, you can use it later.)
If you have not yet chosen your domain name, you can use a free service like LeanDomainSearch or BustAName, or NameStation to find a good domain name.
- Method of payment
When you buy a web host and domain, you can pay either by PayPal, credit card, or debit card. Make sure you have your payment method ready.
Now, let’s purchase a hosting plan …
The step by step guide for buying a web hosting plan:
To get started, go to the home page of Bluehost and click “get Started Now”.

This will lead you to a page where you will find 3 different packages to choose from. I will explain the different packages.
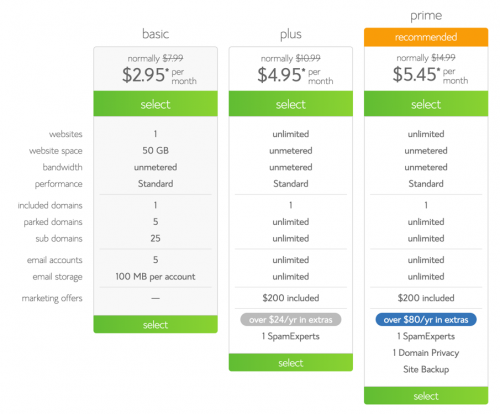
Here are some recommendations:
- Running a single site: basic
- Running multiple sites: Plus
- In need of who.is guard: Prime
Because there is not much difference in price between the Plus package and the Prime package, you need to choose the Prime package. Although if for the time being you will host only one site, with the Prime package, you can host an unlimited number of sites in the future if the need arises.
Note: the links I provide here will give you a huge discount on all these packages. But the discount applies only to the first bill. It is therefore best to purchase a 2 to 3 year package to save some money.
In front of the plan you have chosen Click on “select“.
Note: In this guide, I want to purchase the starter plan for 12 months. The process is identical irrespective of what plan you choose.
Step 1: Choose a new domain (free) or use an existing domain.
After selecting a package, you can choose to either get a free Bluehost domain name or use one of the existing domain names you have.
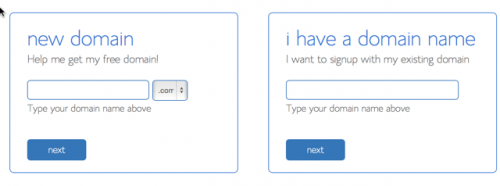
Remember that you can make use of a free domain name later if you do not need it now.
You can even claim your free domain later. Just send an e-mail to the Bluehost customer service for help.
If you are using an existing domain name, you must change the domain registrar’s nameservers to:
NS1.Bluehost.com
NS2.Bluehost.com
If you want to keep things simple and easy, enter the domain name you want to purchase in the “new domain” field and your free domain name will be activated with the web hosting plan.
Click “Next” and from there, the remaining steps will be very simple.
Step 2: Enter the details of your account.
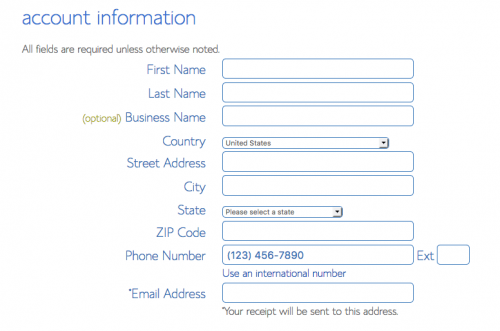
You need to enter your details (name, e-mail address, address, etc.) in this section.
Be sure to check every detail, particularly your email address. Your hosting and login information will be sent to your email box.
Step 3: Select the right package.
This part is important and you need to pay close attention here to ensure you are not charged for add-ons that you don’t need.
Select a hosting package for a period of 24 or 36 months. You will notice that the price decreases with increasing duration.
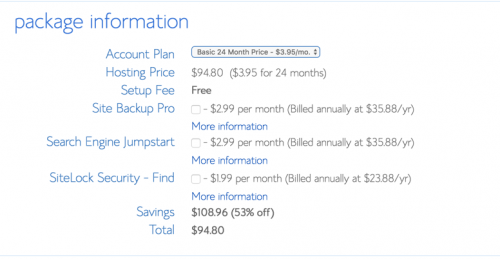
Ensure you do not select the “Sitelock Security” and “Site Backup Pro” options because you do not really need them.
Step 4: Complete your hosting purchase.
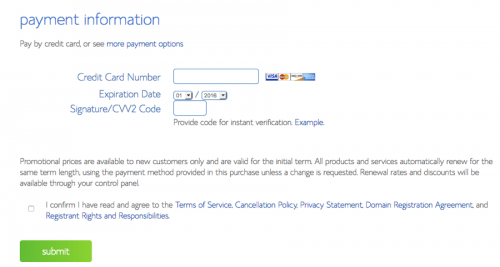
I will suggest that you scroll up again and check all the information once again before making payment.
By default, you will only see the option to pay by credit card, but if you wish to make payment via PayPal, click on “more payment options” and you will see the payment option for PayPal.
After completing the payment, you will see another sales page like the one below.
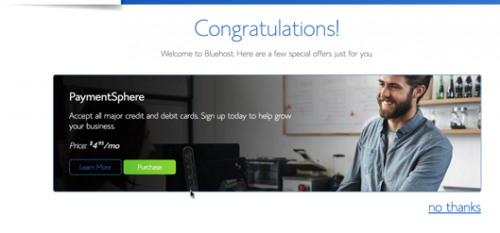
Ignore this.
At the end of the page, Click on “no thanks“.
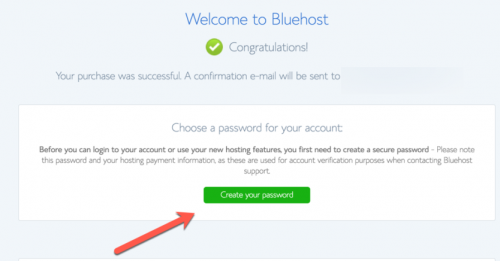
On the next page, you will see a confirmation of the purchase of your hosting package, and you will see a screen like the one below.
Click on “create your password“.
Step 5: Select a password.
This is the final stage when purchasing your web hosting.
You can either choose a password or I recommend using a password generator to create a complex password. Copy and store the password in a safe place and then click on “Paste”.
Click on “Create”, and you’re done!
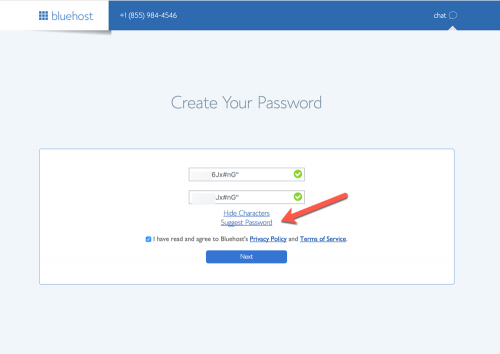
Now the process of purchasing web hosting for your blog is almost completed.
Step 6: Login to the cPanel of your web host.
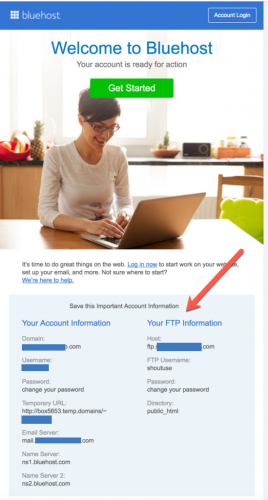
Check your inbox and you will receive a confirmation email with all the login information for your web hosting account. For your safety, the password you created in the last step is the only thing that will not be included in the email.
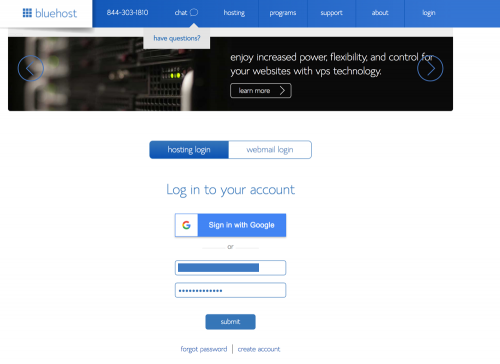
Go to Bluehost.com and at the top area click on “login”.
In the login field, type in your username or domain name and the password you have either chosen or generated.
Click on “submit”.
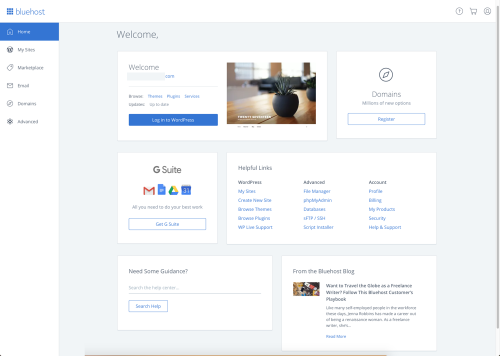
Now you will be taken to the Bluehost Dashboard which is optimized for WordPress:
That’s all! Congratulations! You have just purchased a domain name and web hosting package.
Here are some articles to follow to properly configure your WordPress blog:
How to install a WordPress blog on Bluehost
Important configurations after installing WordPress
If you followed the steps in this article and the two previous articles, you can easily install your WordPress blog, configure it and have it working in about 30 minutes.
Get the Bluehost hosting plan and a free domain name here
Did you follow this guide when purchasing your hosting package? Did you get stuck somewhere along the line? Let me know how you did it in the comments below!
If you find this tutorial useful, please make sure you share it with your friends on Twitter, Facebook, and Google Plus!
There is love in Sharing


