STEP 2: SETTING UP YOUR BLOG
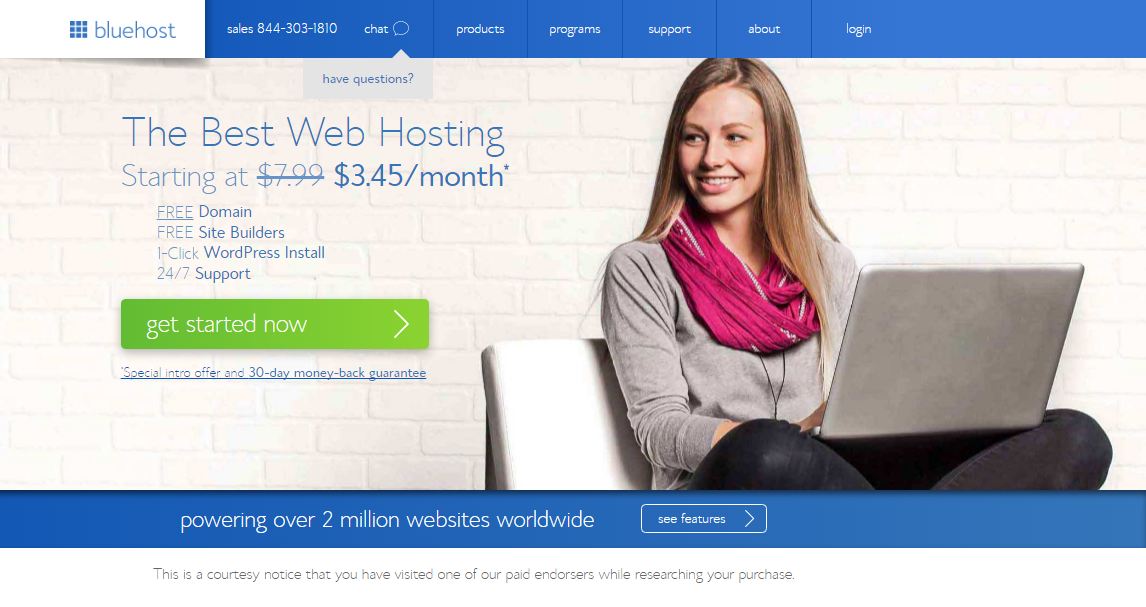
- Click here to get the BlueHost Plan. Click on “get started now”.
2. Select your plan. Here, the basic plan is what I would recommend for new bloggers.
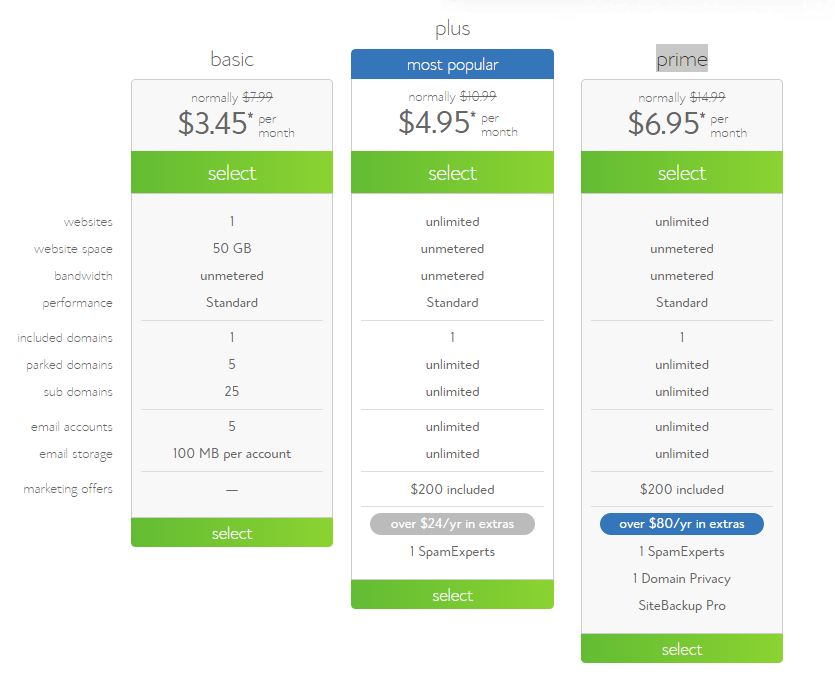
To choose your plan, click on “Select”
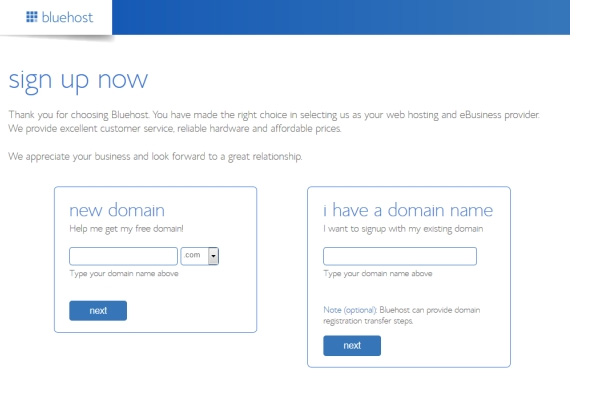
- In the box on the left, enter your domain name and click on “next” to find out if it is available.
If you already have a domain name you want to use for your blog, type it in the box on the right and click on “next”. Only use this box if you have previously made payment to register a domain name.
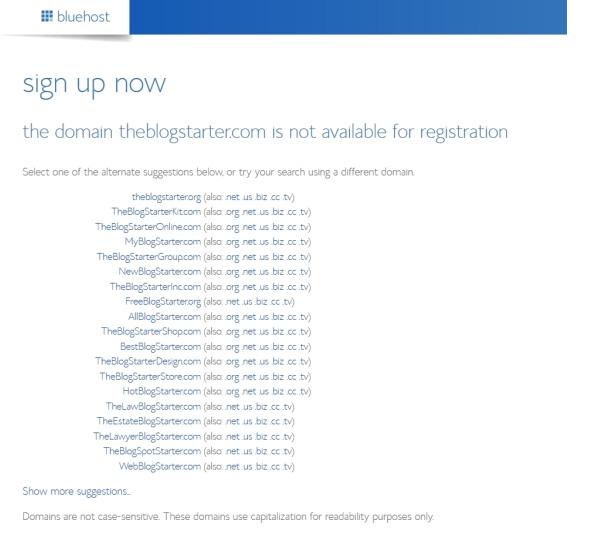
- If the domain name you entered is not available, a list of other available domain names will be shown to you. You may select from any of these suggestions or check another domain name to see if it is available.
- When you find a domain name that is available you will redirected to another page where you will register the domain name .
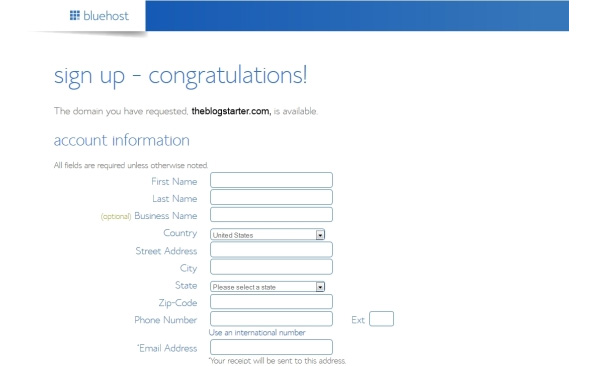
- Also you will be required to select a hosting package with other available options.
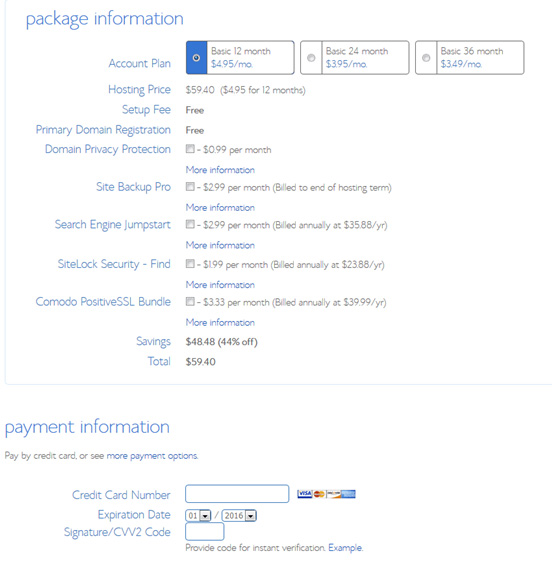
- The 36 months package gives you the lowest rate per month, while the 12 months package cost less. Any of the two packages will work well for you.
- Feel free to uncheck the boxes besides the other products when you sign-up. Later on you may add them if you wish to.
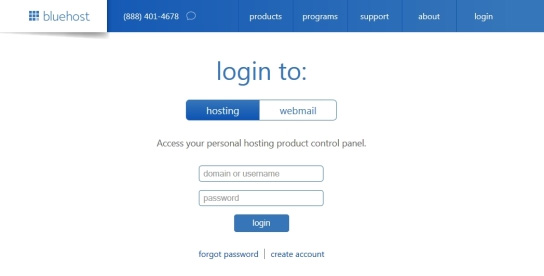
- In a moment your account will be created and you can now log in to your account through the Blue Host homepage by clicking on the log in tab available in the top area. Enter the domain name and password you used during the registration process.
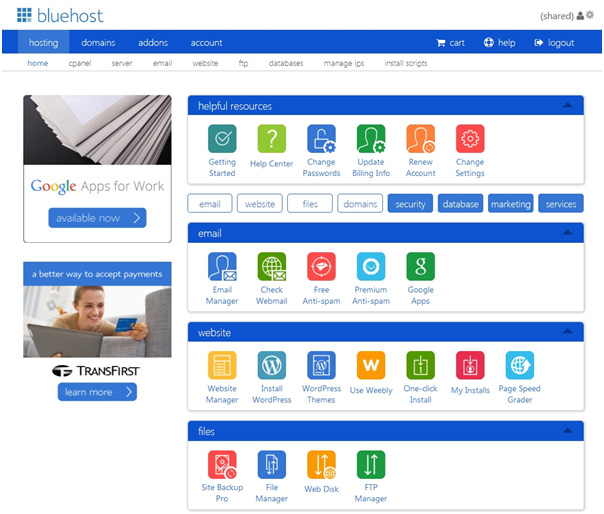
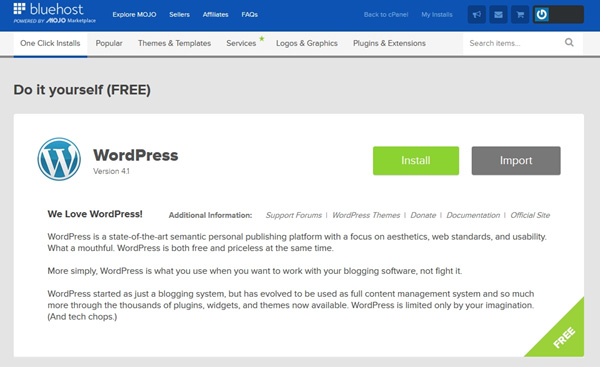
- After logging in to the control panel it is now time to install WordPress which you will use for blogging. Next, close the pop-up windows and click on “Install WordPress” link in the “Website” category.
Automatically you are going to be logged in to the Mojo Market place and redirected to the installation page for WordPress. Next, click on “Install”.
Choose your domain name and click on “Check Domain”.
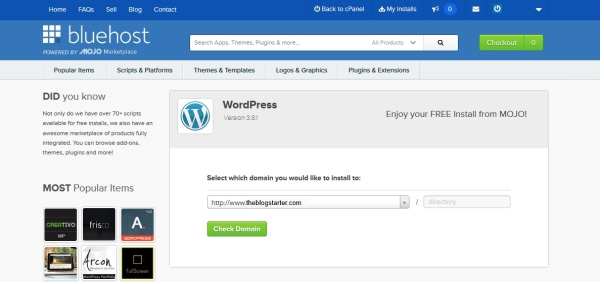
Check the box: “Show advanced options”. You can now type in your site name/title, admin username and password. All of these options except your username can be changed later on. Make sure you save or write down your log in details to help you remember them. When you are done, agree with the terms by checking the box there. Click on “Install Now”.

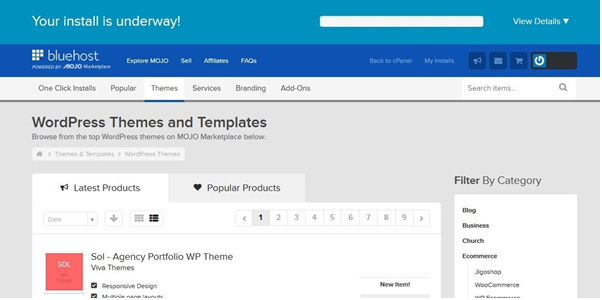
The installation process for WordPress will now begin and will last for a few minutes.
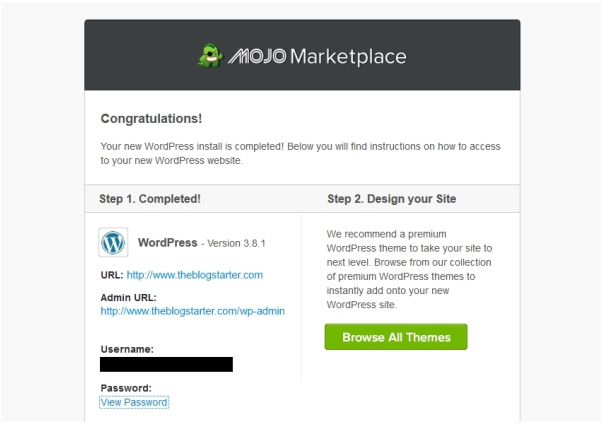
- As soon as the installation process is completed, click on “View Credentials” at the top of the page to see your login details which will be available for only 12 hours; make sure you write or save them in a safe place.
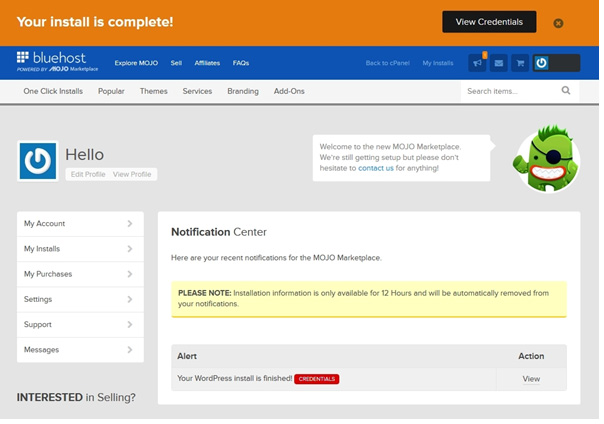
As soon as the installation completes you will also receive an email with your login details.
Go to step 3 to continue with this tutorial.
Tell us about your experience with BlueHost using the contact form below.